Wednesday, June 12, 2013

Kroenen Part 3


I wanted to add a couple of quick shots of the helmet build.  It is a resin cast, which was then painted about 20 times.  I couldn't get the high shine black that I wanted, but I think it turned out ok.


The bottom was painted silver and then rusted with browns and reds.


I used jewelry wire, grommets, and a clear air hose for the side pieces.\


Once Comicon was over and the helmet was signed by Mike Mignola, we built a little mount for it. 


Friday, May 24, 2013

Phoenix Comicon

Today was day 2 of Comicon in Phoenix and I need to do a quick upload.  First, I met Ed from Making Monsters which was the highlight of the weekend so far.  I love his work.  They had a Halloween booth set up which was amazing.  My daughter and I got to do a quick on camera interview for the Travel Channel which should air in October.  Fingers crossed we make the air.


This is my son and my husband.  Both costumes turned out amazing.  We made both from the ground up and I was extremely pleased with the final result.
 This is Mike Mignola (aka creator of Hellboy) signing my husbands gun and my sons sword.  How cool is that?

 HEHEHE...Khan shot first.


KHAAAAAN!!!!


Wednesday, May 15, 2013

Disney Haunted Mansion Shoes

Here they are!!! My daughter made me some custom Disney Haunted Mansion shoes.

The Disneyland Haunted Mansion front view.


The opening coffin and raven


Madam Leota and the seance room


The singing busts


A hitchhiking ghost and my daughter in the blue hair.


The 13 hour clock


Kroenen Part 2

Okay now the fun part!  I used a faux leather from Joanne's.  I liked this because on the back it looks like actual leather or suede.   I found the pattern for this part on The Replica Prop Forum.
If you haven't been on that site yet, go there immediately.  If you really like costuming, you will thank me.  It is a great site for resources and sharing.


I used a pen to mark where I wanted the grommets would be and started punching a ton of holes!!

I used the industrial velcro to attach the wood pieces to the leather.  I had to come back later and use rivets and hot glue to really seal it down good.


Almost done!!  I still need the buckles for the along the shoulders.


Monday, May 6, 2013

Kroenen WIP

This is going to be really long, so I will split this into several posts.  My family is really into costuming and comicon.  Our goal is to eventually to go to SDCC someday.  :)

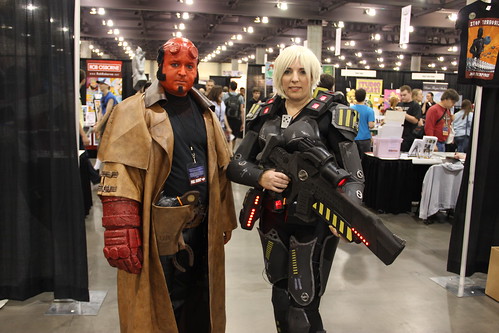
So, this year, my son will be going to Phoenix Comicon as Kroenen from Hellboy,  We decided to
go with what is referred to as "clockwork Kroenen" or "library Kroenen".

I started out by going to as many forums as possible for some help on how to go about making this.
The Replica Prop Forum was a huge help.  

So, I started with some very thin pieces of wood.  I roughly sketched out the design that was on the chest piece.  I had originally tried using wood filler and hot glue to make the scroll designs but they weren't turning out as smooth as I had wanted.  I went back and started over with puffy paint.  For some of the sections I needed to go over it twice in order to get a thick line and design.


This is the front chest piece half way completed.


Once I had the areas filled in the way I wanted, I started with a layer of bright gold. 


Once that was dry, I went back and added a black wash and some antique gold rub n buff to really bring out the details.


Mini Electric Chair iPhone Charger

A few weeks ago, my husband threw together a little mini electric chair.  We were going to just put it out as decor, but then decided it would be really cool if we could turn it into a charging station for an iPhone.


So earlier today, he managed to wire it up as an iPhone charger! I am so excited.  It turned out very, very cool.


Wednesday, April 24, 2013

Sauron cosplay


 So, last year my son decided he wanted to go as Sauron from Lord of the Rings to the upcoming Phoenix Comicon.   This was going to be interesting!!  I started by searching the internet for materials, tutorials etc.


 I decided on Wonderlex.  We laid out the pieces, inserted craft foam in the middle and heat molded each section individually.


Each piece was painted with a hammered metallic paint and then dry brushed with black.  
Each piece of armor has detailed scroll work on them.  This was done by a mix of puffy paint and hot glue.


The helmet was going to be the death of me.  it was heavy with multiple angles, some kept cracking and it was a mess.  Luckily it all turned out ok in the end.


I ended up buying him the actual ring for his glove.  It turned out to be the perfect touch.


Here are a couple of shots from Comicon and a final Photoshopped image.  I am thrilled with how this came out.


Vampire Killing Kit

This is actually my husbands project.  I don't remember what started this, but once we get a bug, look out.

We bought the case at Hobby Lobby when they were on sale.  The case was then padded with florist foam and covered in velvet.  We molded each spot for its contents before we finished gluing in the velvet.

The label wording was taken from an actual kit that was sold by Sotheby's. We changed just a few descriptions to match what we had included in the kit.

I need to take some better pictures, but this is the finished product.   The cross and spike were handmade and aged.  The bottles were store bought, but we added the labels and contents inside.  We then melted wax across the lids for a more authentic look.

The gun was actually a Jack Sparrow prop replica that my son had.  It was perfect.


Friday, April 5, 2013

La Luna

I loved the La Luna short.  It was just perfect in every way.  Sweet and touching.  My daughter Madison, who is amazing, made these La Luna shoes for me for Christmas.  I really don't think there is anything more I can say, so I'll just show you.


And wait until you see my Disneyland Haunted Mansion shoes!!


Mad Hatter Clock

My family is a big fan of Alice in Wonderland.  After Disneyland added the Mad T Party last year, we decided to add a few additional Wonderland inspired items to our house.

First up was the Mad Hatter Cafe wall clock for our kitchen.  My husband cut the basic shape out of plywood.  We put down a coat of basic black and I went to work on the lettering with my Silhouette.

I actually found a font that is Wonderland themed.  Perfect!  I just cut the lettering out in a tan vinyl and added that to the hat shape.  My daughter had a stencil that we thought would work for the band.  Using several shades of brown, we added the band design.


A simple clock mechanism was added.  The hands were all black, so I added a shaded brown line on the outside of each hand.